> ## Documentation Index
> Fetch the complete documentation index at: https://developer.voyado.com/llms.txt
> Use this file to discover all available pages before exploring further.
# Webhooks
A webhook can be seen as a reverse API. Instead of a user polling an API endpoint in a system (Engage, for example) to check for new data, the user can instead configure an URL in that system that can be called only when there is new data. This, essentially, is a webhook.
Structurally, a webhook is just a HTTP POST to an open API. They are simpler than an API endpoint, but have less functionality.
Webhooks, for example, don't allow pushing, deleting or updating data in another system, only receiving data. When you're only sending *specific data occasionally* webhooks might be a good solution.
You only receive data over a webhook when an event occurs. So if the other system doesn't call your webhook with data you can't be sure if it's because no events are occurring, or if the other system is down. Keep this in mind.
The advantages of webhooks are therefore:
* A simpler integration
* Less data being passed
* No polling needed
* Updates only sent when changes happen
## Webhooks currently available
Currently these webhooks can be used in Engage:
This webhook with the ID `contact.acceptsEmail.changed` is triggered whenever the `acceptsEmail` preference changes for an already existing contact.
This webhook with the ID `contact.acceptsSms.changed` is triggered whenever the `acceptsSms` preference changes for an already existing contact.
This webhook with the ID `contact.acceptsPostal.changed` is triggered whenever the `acceptsPostal` preference changes for an already existing contact.
The webhook with the ID `contact.consent.changed` is triggered for changes in consent-typed fields on a contact.
This webhook with the ID `loyalty.addPoints` is triggered whenever points are added to a contact via the Engage UI or through an automation. The transaction is sent in the webhook.
This is used *only* for customers using the point follower solution.
This webhook with the ID `point.balance.updated` is triggered whenever a contact's point balance has changed.
This webhook with the ID `reward.voucher.created` is triggered whenever a reward voucher is created for a contact.
This webhook with the ID `promotion.multichannel.assigned` is triggered when a multichannel promotion is assigned to a contact in Engage.
This webhook with the ID `contact.created` is triggered whenever a new contact is **created** in Engage.
This webhook with the ID `contact.updated` is triggered whenever a new contact is **updated** in Engage.
This webhook with the ID `contact.deleted` is triggered whenever a new contact is **deleted** in Engage.
Read more about how each webhook event can actually be used in the use-cases article:
Even though you are free to configure subscriptions to all the available events, you'll still need to reach out to your Voyado Account Manager or Voyado support to activate the events that you want to subscribe to, so that the data actually gets sent from Engage.
## Requirements
Here are the various requirements for working with webhooks in Engage.
### Basic client requirements
To receive webhooks from Engage you will need to develop and deploy a web service. This is basically an API with a POST endpoint. It's common to use one service for all webhooks, and then distribute the incoming events internally to your different systems.
When developing your webhooks, a service like [Svix Play](https://www.svix.com/play) or [ngrok](https://ngrok.com/) can be used to receive webhooks from the internet on your local development machine.
Your web service must be accessible over the internet. Fixed source IP addresses can be used if your endpoint is behind a firewall or NAT.
There should be no authentication at the receiving endpoint. Instead, you'll verify that the events received are sent from Voyado Engage using signatures and a shared signing secret.
The service you provide must be able to scale with the load.
Voyado's webhooks service provider Svix has good documentation on how to consume webhooks.
### Technical client requirements
You, the client, must develop functionality to verify the webhooks are from the correct sender.
Voyado's webhooks service (Svix) has SDKs and libraries to handle most of what is needed. Libraries are available in Go, Python, Typescript/Javascript, Java, Kotlin, Ruby, C# (dotnet), Rust and PHP.
You can see source IP addresses [here](https://docs.svix.com/receiving/source-ips). This integration uses the EU region.
It's possible to add custom headers to webhooks and also rate limiting, if needed.
If you want to use the optional feature of end-to-end encryption, you must develop functionality to decrypt the payload data (in the same way as with soft identification.
### Legal requirements
When you are implementing webhooks in Engage and move to a production environment, you'll need to approve Svix (Voyado's webhooks provider) as a GDPR sub-processor.
### Security considerations
The security involved in using the webhooks solution can be seen as many nested layers.
1. **The webhook itself**: No security.
2. **Signing the webhook message** with Signing Secret: The recipient can use this to verify that the webhook comes from Voyado. The Signing Secret is found in the portal (meaning that Svix controls it). The client can rotate the key whenever they want.
3. **IP lock**: By using this, messages can only be accepted from specific IP addresses.
4. **Payload encryption**: All data from Engage is encrypted with a key that only Voyado and the client know. It is configured in Engage, meaning that Svix cannot read any of the data that passes through it.
While it is the client themselves who decides how many layers to implement, layers 1 and 2 above are the absolute minimum.
## Setting up a webhook in Engage
Once you have created your webhooks, you'll need to set them up in Engage. The steps are:
Contact your Voyado account manager to enable webhooks in your Engage instance. Depending on your agreement, a supplement might be required. The webhooks module must then be activated in the Engage back-end, and the correct permissions granted to users.
Now you'll configure the client endpoint in the Engage UI.
Go to **Administration/Webhooks Dashboard** to see the Webhooks already set up.
Then select **+ Add Endpoint** to add another.
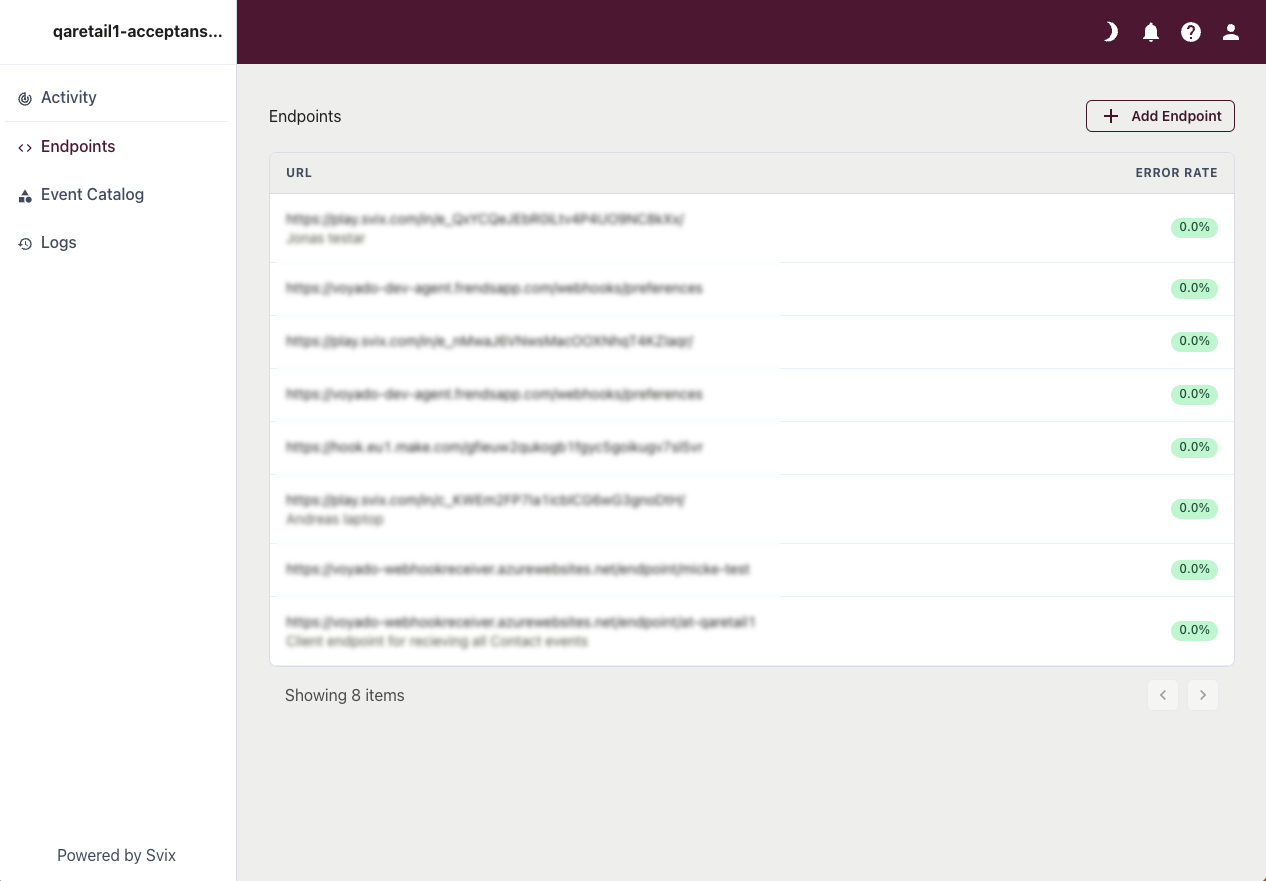 After adding your endpoint, select it and then choose which event you want to send to it:
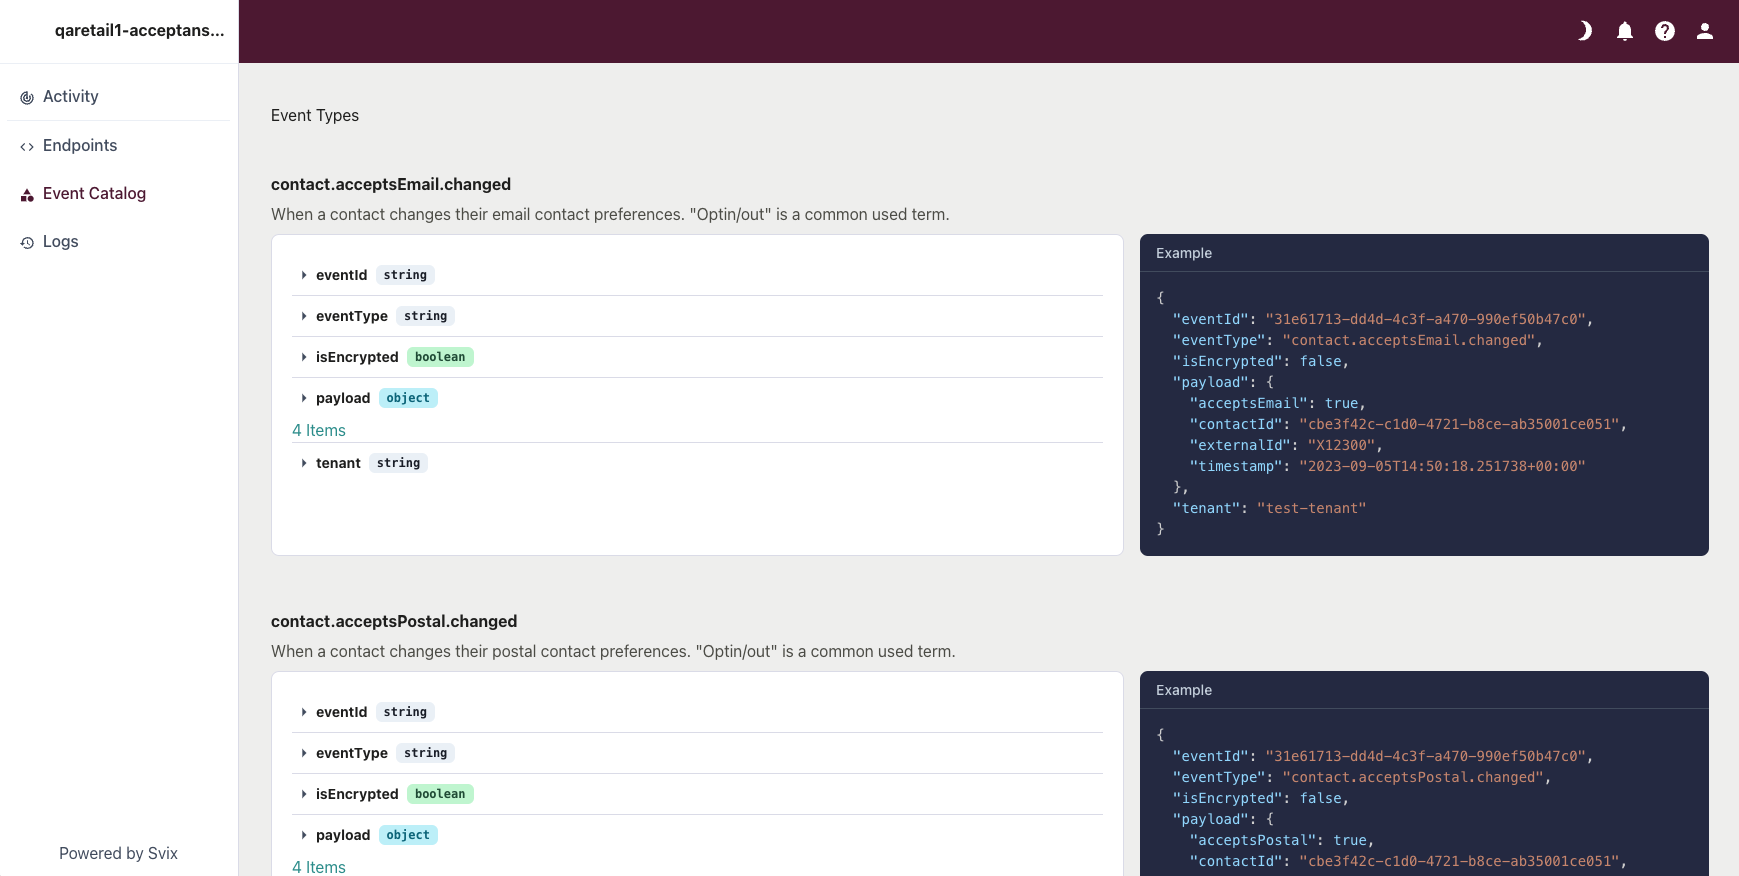 Get the Signing Secret used for verification, as well as the Payload Encryption Key (if you are using it) from your Voyado account manager. When sending these to somebody else, be careful to use the same trusted method as when sharing API-keys. The signing secret is created and handled by Svix, and can be rotated if needed.
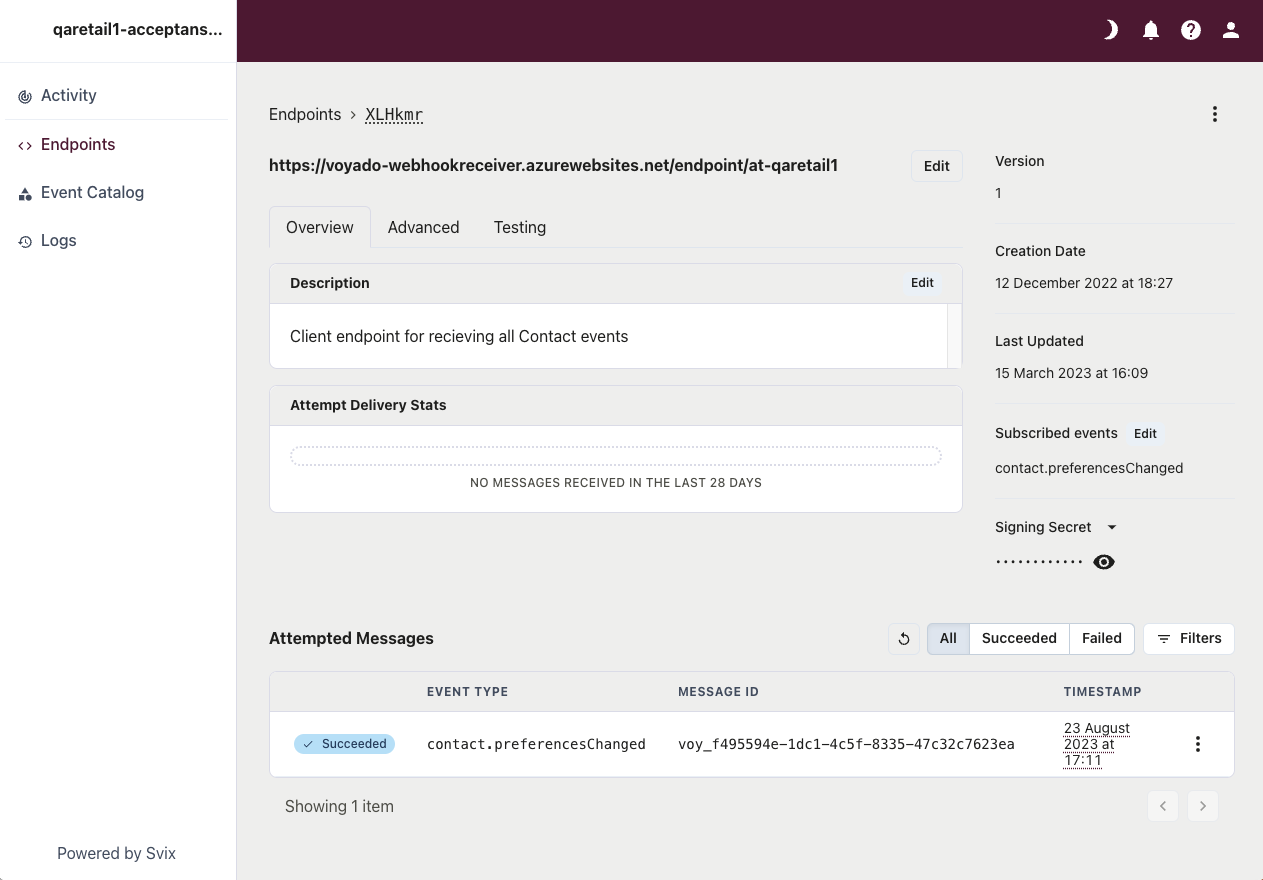 You can use the “Testing” functionality in Svix to send test-events to the endpoint. Check the log for errors.
If you need it, configure a rate limit so the client endpoint can handle the load.
You can also choose to configure a custom header with some kind of token to further increase security.
You can use the “Testing” functionality in Svix to send test-events to the endpoint. Check the log for errors.
If you need it, configure a rate limit so the client endpoint can handle the load.
You can also choose to configure a custom header with some kind of token to further increase security.