IMPORTANT: We're updating product naming across our documentation. Engage is now Customer Engagement and Elevate is now Product Discovery. This doesn't change Voyado's services, functionality, or terms of your agreement. Be aware, as these changes happen, that you may see both the old and new names being used.
All your stores, whether physical or digital, are represented in the Customer Engagement database. They are either added manually by you, or created automatically whenever a purchase references a store that does not yet exist in your Customer Engagement environment.
Every contact in Customer Engagement has two stores connected to them:Created-in store: Also known as the recruited-in store, this is the store where a contact was first added to Customer Engagement. Once this is added to a contact’s data it cannot ever be changed.Regular store: This is the contact’s “usual” store as determined by RFM values. This can change based on the contact’s behaviour.
When a contact is created, the regular store is by default the created-in / recruited-in store.
Your active stores should be set up in Customer Engagement before contacts are created. Additionally, any new stores that open should also be added. This allows customers to be linked to the correct recruited-in store or regular store through the store ID in their purchase data.If a transaction is processed by Customer Engagement using a store ID that doesn’t exist, then Customer Engagement will create that store.
Here is how to create a store in Customer Engagement:
1
Navigate to the stores section in Customer Engagement
In Customer Engagement, go to Administration, then select Stores and Stores again.
2
Create a new store
On the Stores page select “Create store” in the upper right corner.
3
Fill in store details
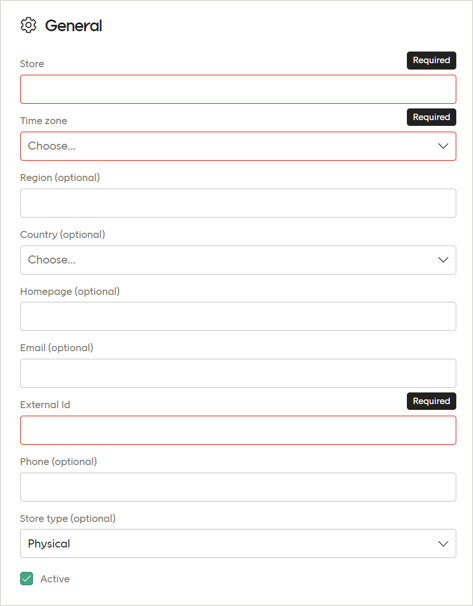
Fill in the fields. Required fields are “Store”, “Time zone” and “External ID”.The “Store” field is the display name for this store as it will be shown in Customer Engagement. It should be unique to reduce confusion but doesn’t have to be.The “External ID” is the one on the receipt. It is usually found in your ERP system. This is the store’s unique ID in Customer Engagement and can’t be the same as another store in Customer Engagement.
Adding a store
4
Save and create
Ensure the “Active” checkbox is checked and then select “Save”.
A store’s External ID is used to connect imported receipts with that store. If you change a store’s External ID in Customer Engagement, but are still sending receipts using the old External ID, Customer Engagement will then create a new store using that old External ID. That is not good.To correctly change a store’s External ID, the customer needs to stop sending receipts using the old External ID, then change the External ID value in Customer Engagement, and then begin sending receipts using the store’s new External ID. Doing it this way avoids any issues.
Be sure, if changing a store’s External ID, that you do it the way described above.
When designing an e-mail send-out, there’s a way to decide which product feed will be used to populate it. To get this working, there’s a few things to do in the Customer Engagement back-end and front-end.
1
Configuration in Customer Engagement
Your Voyado team needs to make adjustments to the Customer Engagement back-end. Contact them for this step.
2
Edit the store
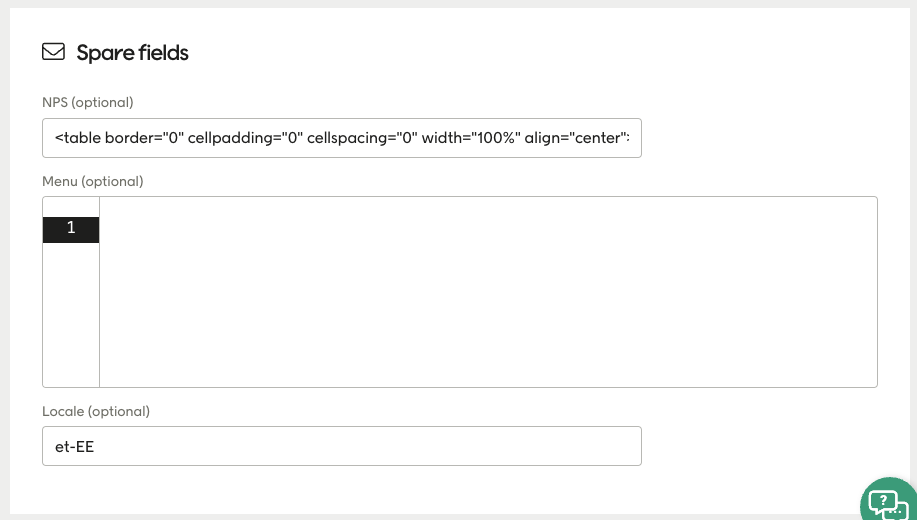
When that’s done, go to the Customer Engagement frontend and select Administation then Stores and then Stores again. You’ll see a list of all your stores. Selecting one takes you to Edit store. Scroll down to the Spare fields section. Locate the “Locale” field.This is where you will enter the same locale as the one specified in whatever product feed you want to use for this store.
Configuring spare field
3
Do the sendout
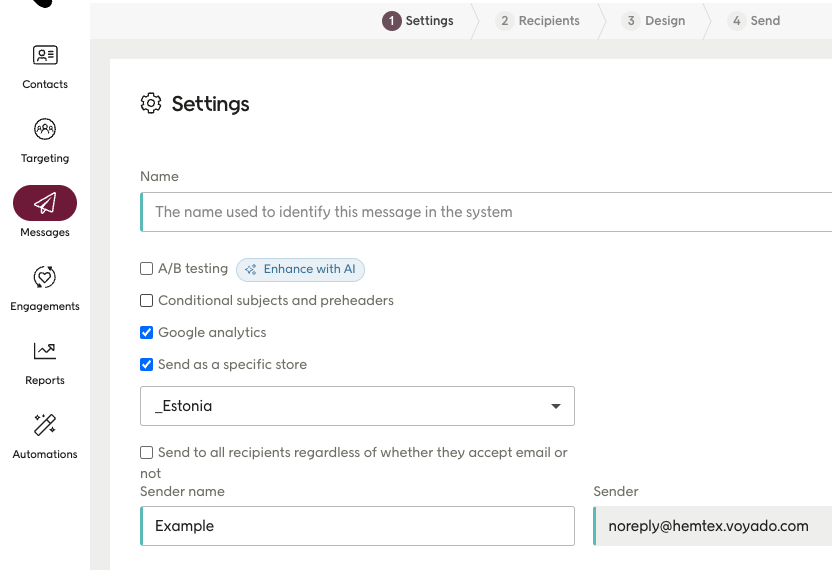
Now, when you are creating an email, you can select “Send as a specific store” and select the store (and, indirectly,the locale or product feed connected to it) that will be used for this send-out.
Configuring store settings
If you define the “locale” attribute for all stores, even physical, you can send as any store using the correct language/currency when creating a email send-out. You are not restricted to just e-com stores.
It’s only possible to get data from ONE specific product feed for every email send-out. Therefore, in Customer Engagement, you can only use one language (and one currency) per send-out.
The required fields here are name and externalId. The POST request will return a 400 error if these are missing from the payload.While not required, you should also specify:
timeZone: Since the Customer Engagement UI requires it and you’ll probably be accessing the store through the UI at some point
type: Given as either “ECOMM” or “RETAIL” or “OTHER”
countryCode: For example “SE”, “FI”, “IR” - Used to improve reporting and segmentation
The string value for the country will be calculated from the countryCode value so you don’t need to send that. Note that county also exists as an attribute. This can be seen as an area that’s between city and region in size.
Optionally add includeInactive as “true” as shown above to include inactive stores in the response.Leave it out if you don’t need it (the default is “false”).The response will have this structure:
The payload will be similar to the one you used to create the store:
Only send the values you want to change (which means a smaller payload than the one shown in “Create a store” above). Any empty or null values sent in the payload will overwrite the existing values for that store.
The payload you’ll usually send to update a store looks more like this, containing only the value or values to change:
{ "homepage": "newhomepage.com"}
Assistant
Responses are generated using AI and may contain mistakes.