Contact attributes
A contact in Engage is created with many default attributes, which are known as standard attributes (or standard fields). For example: Contact type, First Name, Last Name, E-mail, and others.
You can see the whole list of standard contact attributes here.
It's also possible to creature custom contact attributes for your particular Engage environment, if you need your contacts to hold more information than the standard attributes. Here's how to do that through the configuration area.
Warning
Voyado recommends that you do not have free-text fields set up on for contacts and exposed in any interface where staff can enter end edit the data, such as in a POS. This causes a risk that personal data could be entered and then shown, for example on the contact card. This could cause personal data breaches as well as contravene policies and relevant legislation.
The contact attributes page
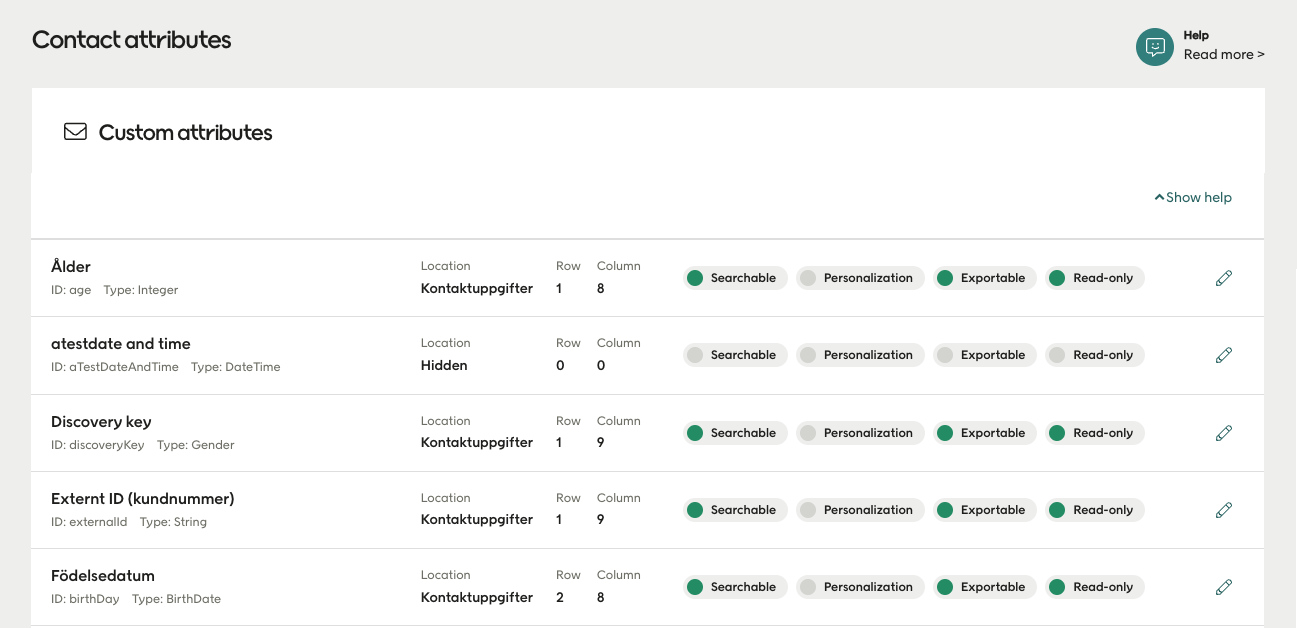
When you arrive at Contact attributes in the configuration area, you'll see a list of all the current custom attributes that have been created (if any).
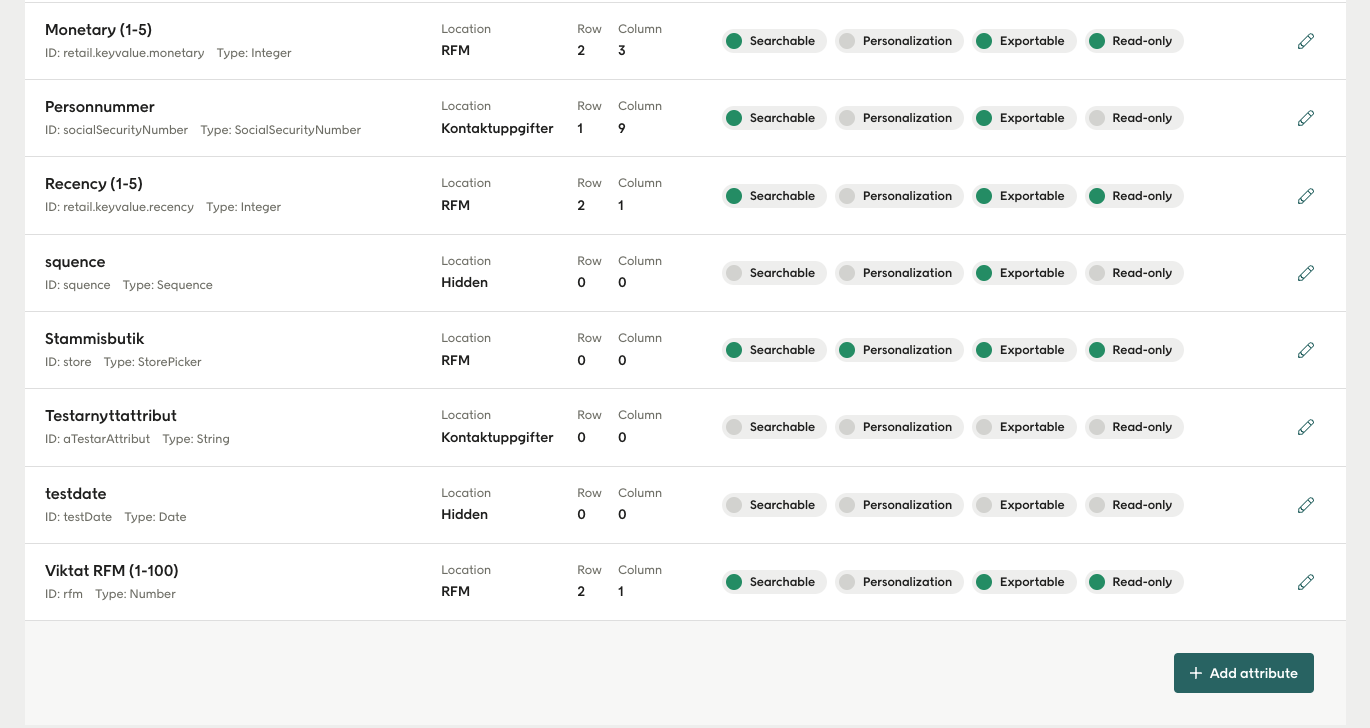
At the bottom of the custom attributes list is the button that you use to add a new attribute:
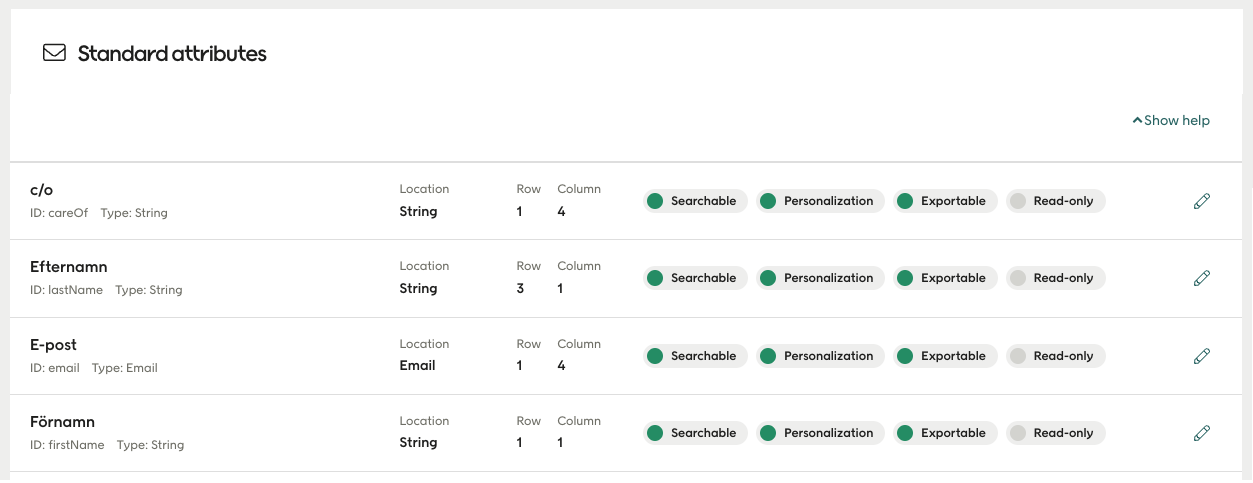
Below this is the area where you can see the standard (default) contact attributes:
Finally, selecting the "edit" icon on the right hand side of an attribute brings up this panel, allowing you to edit some of the values for that custom attribute.
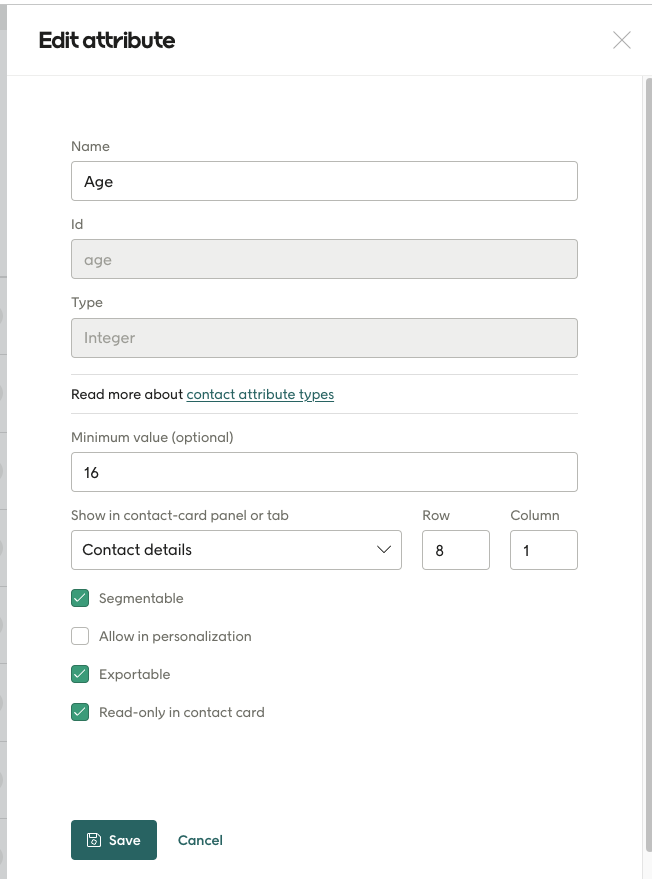
See the next section for a description of the settings on the panel.
Adding a custom attribute
When you select "Add attribute" you will see this panel:
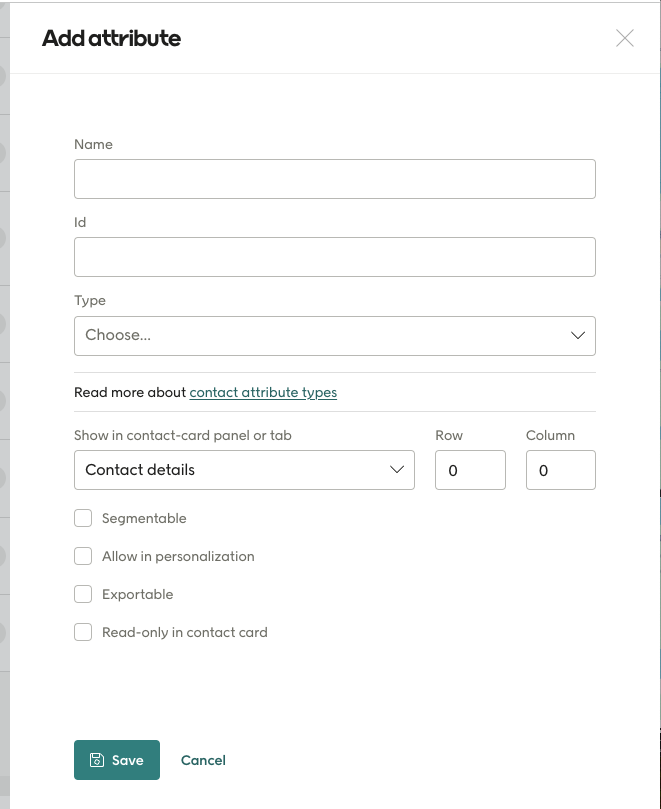
These values are needed to create your new custom attribute. The first three are:
Name: This is the attribute's display name, shown on contact cards or in segmentations.
Id: This is an attribute's database name used during integration, when importing/exporting, or when personalizing contact data in a mailing from Engage. It is required to be unique (an attribute can't be created if you try to use an already existing attribute name). An Id can't be changed once the attribute is saved and created.
Type: There are many attribute types used for different data types or behaviours. Only some types can be used to create custom attributes. In the next section are the types available for creating custom attributes.
Important
The Id is the unique identifier for the attribute and can only contain the characters a-z, A-Z, 0-9. It is best practice to spell the Id using camel case, for example: "myUniqueId".
The next three settings decide the placement of the custom attribute on the contact card in Engage.
Show in contact-card panel or tab: This determines where in the contact card in Engage this attribute will be displayed. For example, "First name" might belong to the "Contact details" tab, while a "Number of pets" attribute might belong to "Interests".
Row: The row (1-3) of your custom attribute on the page.
Column: The column (1-3) of your custom attribute on the page.
Each attribute also comes with four independent check-boxes.
Segmentable: Select this if the attribute can be used for segmentation.
Allow in personalization: Select this if the attribute can be used to personalize contact data in emails, like this: "Hello [[firstName]] here comes a special offer".
Exportable: Select this if the attribute should be included when exporting contacts.
Read-only in contact card: Select this if the Engage admin can change the value of this attribute for a contact directly on the contact card in Engage.
Data types when creating custom attributes
When creating a custom attribute you have to choose its type. Here's what you can choose from.
Checkbox
A checkbox is suitable for true/false values. When the attribute is created, you can choose the predefined default value that contacts will get upon creation if no specific value is given. In addition to true/false, a new contact can be given the value of "not set". Example of use: "Has drivers license: true"
Checkbox (multiple)
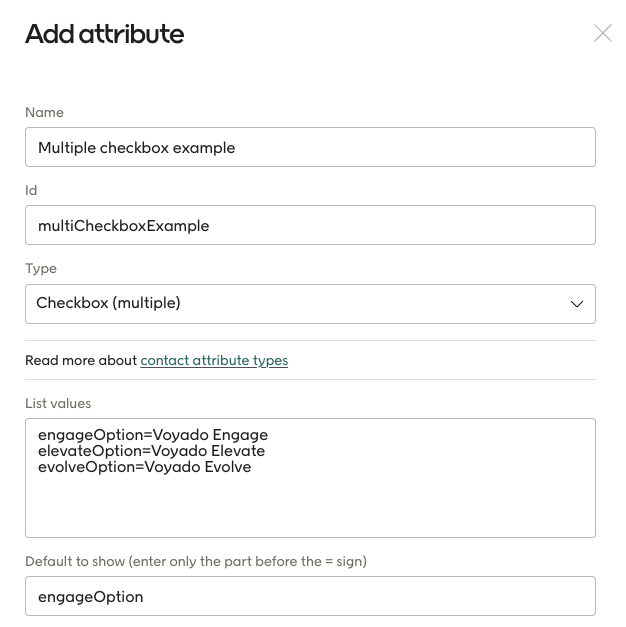
A multiple checkbox attribute is used to group several check-boxes within the same category. The id and name of the various checkboxes you want to use are specified like this:
id1=Display name 1
id2=Display name 2
id3=Display name 3
In the configuration area, it looks like this:
Important
In the "Default to show" field be sure to enter only the part that comes before the = sign. In the example above, to make the first option the default, enter "engageOption". The default shown to the user will then be "Voyado Engage". Be sure to spell it correctly as no verification is done.
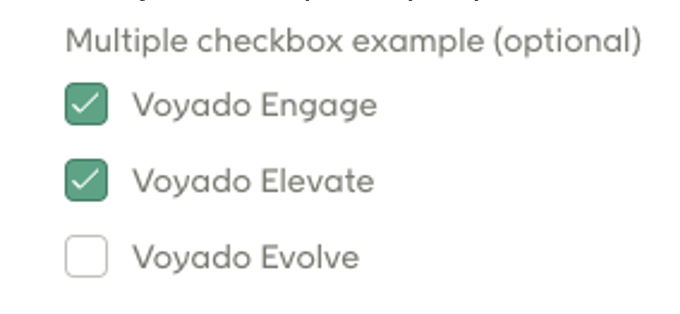
When creating a custom attribute, you can specify the check-boxes that are pre-selected for new contacts. This is done by comma-separating those ids in the "Default value" field as seen in the image above.
This example would give the following setup for newly created contacts:
Another use case would be to create a custom attribute named "Interests" with the options Sailing, Golf, Tennis, Wrestling.
Consent
A consent that the end-user can choose to accept (or not). See how to configure consents here.
Date
The basic date attribute, consisting of year, month and day.
Date and time
A combined date and time attribute that can be used when tracking a specific time, for example when the contact last logged into the e-com. This follows ISO 8601.
Dropdown menu
A list of values that will appear in a dropdown, allowing one to be selected. A default value can be set.
Integer
A whole number without decimals. When configuring this attribute, you can define a minimum value. The maximum length of this field is 12 digits. Example of use: Number of pets.
Long string
Use this if you need a text with several words or sentences.
Number (decimal)
Stores a decimal number, for example, height in meters. Be careful to use the correct decimal separator in your number, which will either be point or comma depending on your UI Culture setup.
String
Use this to hold a short text.
Sequence
This is special type used for incremental member numbers. Note that attributes of type "Sequence" can only be set up and edited by Voyado in the back-end. These attributes cannot be edited in the Configure Engage area. Contact support if you need changes made to a Sequence type attribute.