Double opt-in
A double opt-in is where a contact confirms their sign-up for marketing communication / membership. It basically makes signing up into a two-step process.
First the contact signs up, maybe at the checkout, using their email address, causing the standard preferences to be set. An email is then sent, containing a link.
The contact then needs to actively click this link, causing the additional double opt-in consent to also be set. Only then should they be included in any email send-out.
It's up to the Engage admin to confirm this before including the contact in a sendout.
Why double opt-in?
Using double opt-in increases the chances that only interested customers receive marketing information. It also protects your sender reputation, since now only real email addresses will be included in send-outs. A third reason is that some countries (like Germany) now require sign-ups to be done in this way.
Below you can see the double opt-in flow in both the new and old email editor. It's best to read through both since they refer to each other and you'll get the best overview that way.
Double opt-in - classic email editor
A few things are needed in Engage to make this work in the classic email editor.
1) First a new consent must be added (a custom contact attribute of type "Consent") in the Configure Engage area. Ideally you'll give the consent a name mentioning double opt-in (which is not obligatory, it just makes it easier to keep track of). Call it doubleOptInConsent for the sake of this example.
2) Then you'll need an email template that contains a clickable link, as shown in the image below.
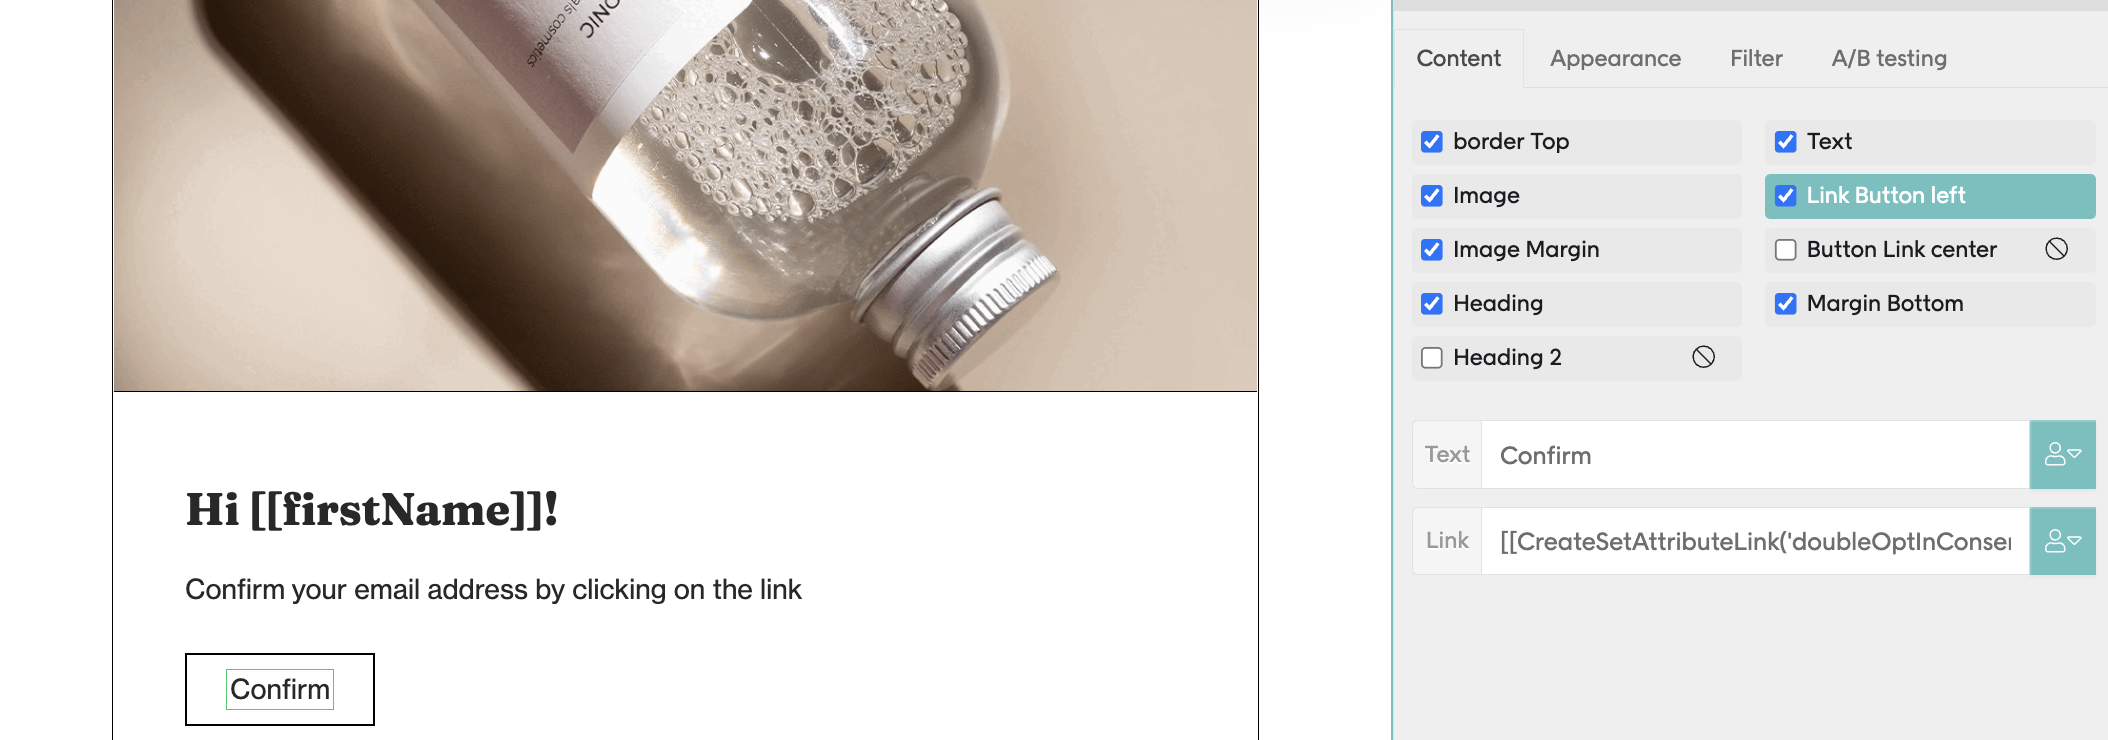
On the link you'll need this code that will set doubleOptInConsent and also redirect to the URL specified.
[[CreateSetAttributeLink(doubleOptInConsent, true, 'https://landingpage.com')]]
3) Finally you'll need two automations set up. One will use the "New contact registered" trigger that will send the email using the template you set up in step 2. The second will use the "Approved consent" trigger, filtering for the doubleOptInConsent consent. This automation is triggered when the link is clicked and the consent is set. Here is where you can send your "Welcome on board!" email.
The double opt-in flow
Here's an example of the flow in action.
A contact signs up at the checkout and indicates which communication they want to receive. Based on that, the standard preferences (acceptsEmail, acceptsSMS, acceptsPostal) are set when the contact is created Engage. But doubleOptInConsent is not set yet.
The contact's sign-up is picked up by your "New contact registered" automation, which sends an email to the contact's address, using the template you made above.
Once the link in the email is clicked doubleOptInConsent is set to "true" and the contact is redirected to the URL specified. A welcome email is sent.
Now when you as the Engage admin want to do an email send-out, you'll need to confirm that all contacts included have, as usual, acceptsEmail set to true but also that doubleOptInConsent is set to true.
Important
Remember, it's up to the Engage admin to always confirm that the double opt-in flag is correctly set before including a contact in a send-out.
Double opt-in - Design studio
In the Design Studio email editor, the special link functionality (CreateSetAttributeLink) is no longer used. Instead, the consent is updated directly inside the automation using the "Set consent" activity, which gives a more controlled double opt-in process.
1) Create a consent attribute
2) Create an email template: Create your email template in Design Studio. Insert a regular link that directs the contact to a confirmation landing page, for example: https://landingpage.com/confirm
Note: In Design Studio, the link itself does not automatically set the consent. Consent is handled in the automation after the link is clicked.
1 - Create a consent attribute
Just like in the classic editor, create a new consent attribute (type “Consent”) in the Configure Engage area. Call it something like doubleOptInConsent to make it clear what it's used for.
2 - Create an email template
Create your email template in Design Studio. Insert a regular link that directs the contact to a confirmation landing page, for example: https://landingpage.com/confirm
Note
In Design Studio, the link itself does not automatically set the consent. Consent is handled in the automation that's triggered after the link is clicked.
3 - Build the automation
Now set up the double opt-in flow as an Engage automation, following these steps:
1 - Trigger - New contact registered
This triggers the automation when a new contact is created.
2 - Action - Send email
Send the email you created in Design Studio. With a CTA button that links to your landing page, such as: https://landingpage.com/confirm
3 - Action - Add a trigger (Wait for event)
Wait for the link click and extract the specific link from the email.
4 - Action — Set consent
Use the "Set consent" activity to set doubleOptInConsent to true.
5 - Action — Send email (Optional)
You can now send a welcome email once consent has been set.
The double opt-in flow in Design Studio
This is the flow:
A contact signs up, and standard preferences (acceptsEmail, acceptsSMS, acceptsPostal) are set. Note that the doubleOptInConsent is not yet set.
The automation sends the confirmation email.
The contact clicks the confirmation link.
The automation detects the click and sets doubleOptInConsent to "true" via the "Set consent" activity.
A welcome email is sent (Optional)
The Engage admin must ensure both acceptsEmail and doubleOptInConsent are true before including the contact in send-outs.
About "Set consent"
The "Set consent" activity is used to update a contact’s consent preferences directly within an automation. Consent changes are logged and can be reviewed in the contact’s profile under the Consent tab.
Note
All consent updates must be triggered by the contact’s own action. Bulk updates should be avoided as they may not comply with GDPR or local regulations.
Email scanners and GDPR
Some email systems scan incoming emails and automatically access any links to confirm they are not malicious. This can cause an opt-in link in an email to be automatically "clicked" before the receiver opens it, generating a false consent. Note that it is outside of Engage's area of responsibility to guarantee that unapproved consents are not created in this way. It is always up to you as the data controller for ensuring that GDPR requirements are met.
There are however many solutions to this problem. You can for example set up a landing page where there's a second button to click that gives the actual consent. Or use a captcha on that landing page to confirm the visitor is human. Or have a client-side redirect that adds some extra required parameter to the link when it's been clicked by the user.