Contacts
Handling customers (contacts) is central to the Engage SFCC integration.
Contact creation
An Engage contact is created through the integration in two ways:
When a customer creates an account in SFCC
When a guest (a customer without an account) makes a purchase
Note
Both of these methods can be toggled ON or OFF.
Contact updates
Updates can happen in both directions.
From SFCC to Engage
A contact is updated in Engage when any of the following fields are updated in SFCC:
Personal information:
First name
Last name
Street
Postal code
City
Email
Phone number
Preferences:
Accepts email
Accepts sms
Accepts postal
From Engage to SFCC
Whenever a customer logs into their account, the cartridge fetches their data from Engage and updates the fields below in SFCC:
Personal information:
First name
Last name
Street
Postal code
City
Email
Phone number
Loyalty information:
Point balance
Member level
Points left for upgrade
Level expires
Level based points
Preferences:
Accepts email
Accepts sms
Accepts postal
Note
If a merchant wants to sync additional fields between SFCC and Engage, that can be done by modifying the code.
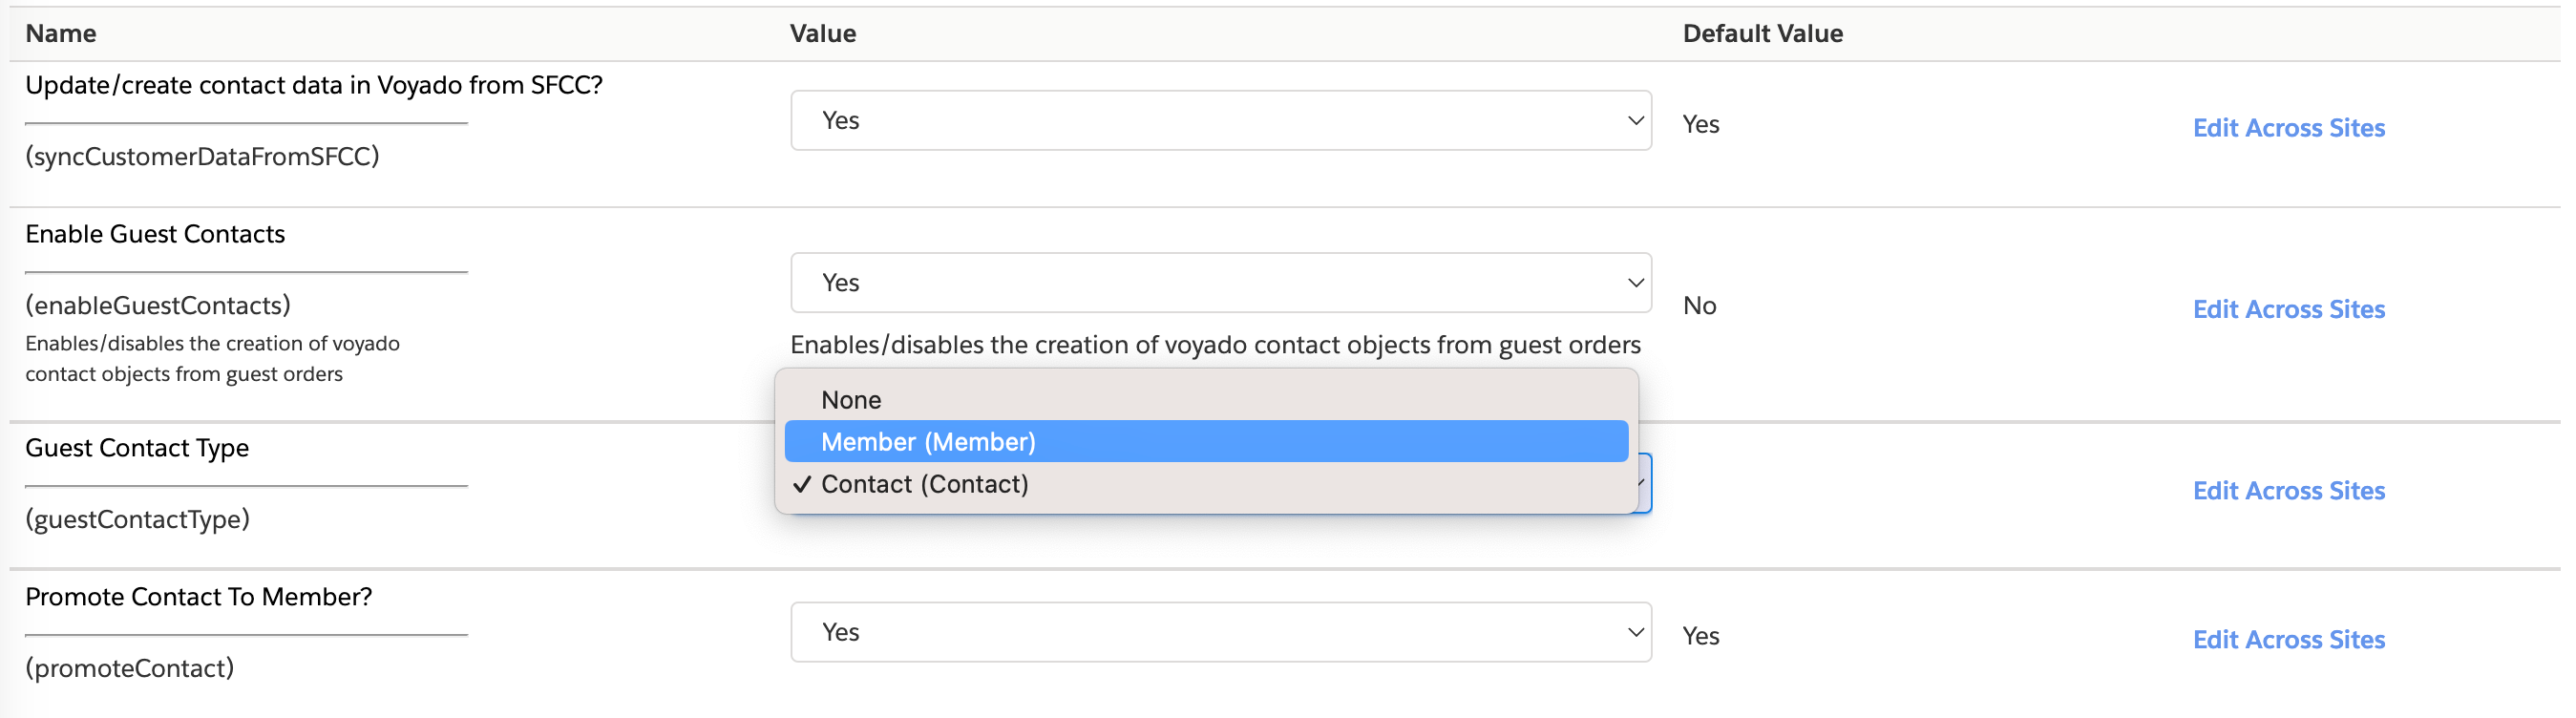
Configuration options for contacts
In the admin area of SFCC are several configuration options relating to contacts in Engage. You can:
Enable or disable the two-way contact sync from SFCC to Engage.
Enable the use of guest contacts (customers who place an order without an account).
Choose which contact type guest contacts will have, “Member“ or “Contact“.
Enable or disable the “Promote to Member” flow.
Guest contacts
As mentioned above, you can configure how to sync guest customers, either as “Member“ or “Contact“. This syncing is not done in real-time, but is scheduled to run every minute. If you want to make the syncing real-time, you can do this with some minor code adjustments.
To find the syncing job, navigate to Administration / Operations / Jobs in SFCC and find and run the job named “Voyado - Process Receipts”.