Shopify accelerated onboarding

Welcome to the accelerated onboarding for Voyado Engage and Shopify. Soon you'll have the combined power of Engage and Shopify at your fingertips. Below is everything you need - information, links and guides - to get you there.
The timeline for your onboarding will look something like this:

So let's get into it!
Important
All links below will open in a new tab, so you'll always be able to come back to this page.
Step 1 - Configure Engage and Shopify
Tip
 Here's what you'll need before you start:
Shopify access
Access to product feeds in Shopify
A designer for your email design
With these, you're ready to tackle the steps below:
The configuration form is the basis for how your Engage environment will be configured. The link below will open the form in another tab and let you get started.
If you need help with the form, reach out to Voyado at onboarding-engage@voyado.com.
Once you've filled in the form, return to here and continue with the next step below.
There are three email templates to choose from, each with 16 modules.
In this form you'll decide the colors, fonts, links, texts, translations and everything else that will be used in your email templates.
Then, in this form, you will upload the email assets needed to build your chosen templates.
Email warm-up is important to ensure email deliverability and stop your emails getting flagged as spam. The warm-up period will depend on your database size. For example, if you have a few hundred thousand contacts, the warm-up period will be around six weeks. So you'll need to plan for this warm-up early in your setup. To learn more about this, you can access an online course.
See the next section for information on Voyado Academy and a link to the course.
 Voyado Academy Courses
As an Engage user, you have access to Voyado's courses and certifications, allowing you to get the most out of Engage. These can be found in the Voyado Academy. You should have received a separate email with the information you need to access Academy. You can start with:
Now you'll wait for this to happen
Tip
You've completed Step 1! Now your team at Voyado can get to work on:
 Validating your Engage configuration
 Developing your email design and template
 Providing you with the URLs and API keys you'll need for both the Engage staging and production environments
Shortly you'll receive two emails asking you to set a password for your user. These emails look similar, but one is for your Engage staging (test) environment and the other is for your Engage production (live) environment. You'll need to set passwords for both, as you'll be working in both environments.
Note that the email for staging contains an URL with "staging" in the name.
Caution
Here you'll need to wait until everything in the preceding box has been completed. Once you have confirmation that your Voyado team have completed the tasks listed, and you have received the emails you need, you can continue with the next section.
Step 2 - Get started in Engage
For this step you'll need the base URL and links to encrypted credentials from your "Getting started" email. You'll also need the encryption keys that were sent to the mobile number you specified in the "Engage Configuration" form in Step 1.
Tip
 Here's what you need before you start:
Access to your Shopify store.
The Engage login URL from your "Getting started" email.
A contact person at Sitoo or Front Systems if you use one of these as a POS.
Access to your domain host.
Important
Voyado recommends that you first connect your live Shopify store to your staging environment in Engage for testing everything out.
Caution
Voyado strongly advises against using real personal data in the staging environment due to compliance (GDPR) and IT security risks. The staging environment is not designed for processing live data. If a customer chooses to use real personal data despite this recommendation, they do so entirely at their own risk. Voyado accepts no liability or responsibility for such use. Any terms under the applicable agreement where Voyado otherwise accepts liability will not extend to such use in the staging environment. Customers are solely responsible for ensuring compliance with all relevant data protection and security requirements when using the Voyado Engage staging environment.
Now you're ready for the steps below:
The first step is to add your stores in Engage. Read about how that's done here:
Note
You'll need to set up the same stores in both the Engage staging and production environments.
You'll need to grant permissions to those users who will have access to your Engage environment, and decide if they will be administrators, configurators or otherwise.
Caution
You need to set up the same users in the same way in both staging and production.
Caution
In the staging environment, your Engage users will need to be added to the allowlist so that Engage can reach them with email sendouts.
You'll do this in your Shopify store.
Follow the instructions below to install the app.
This step is only needed if you are using Shopify POS, Sitoo or Front Systems. If you are not using a POS, skip ahead.
Read here what the requirements are for your particular POS:
You'll need to validate your domain in the Engage production environment so it can be used in the "from" field in your send-outs. This validation can take a few days so it's important to start it now for production.
Caution
Domain validation/authentication is done for your Engage production environment, not for staging.
The email you gave as configurator in the configuration form is the person who will by default have domain authentication access. If you can't access your domain host, contact your IT department or the person in charge of your website / e-com.
These are the steps to follow to validate your domain:
 Domain authentication and sender addresses (only in production)
 Voyado Academy Courses
Here are the courses relevant for this step:
Now you'll wait for this to happen
Tip
You've completed Step 2! You're more than halfway there.
Now your team at Voyado can get to work on:
 Creating your email templates in the Engage staging environment
 Allowing you to test your email templates in Engage
You'll have to pause here until your Voyado team informs you that all this is done before you can continue on with Step 3. Use that time to go through the relevant courses in Voyado Academy.
Step 3 - Email
In this step you will test your email templates. To do this, you'll create some automations in Engage that will send out emails. After that, you'll create some test orders in Shopify and test abandoned cart and abandoned browse functionality.
In Engage there are a number of test automations set up in staging, allowing you to start testing immediately.
Tip
 Here's what you need before you start:
A designer and someone with technical knowledge of your e-com to test your email design.
Confirmation that users are being created in Engage so that you can test your email send-outs. In the staging environment, remember to first allowlist the addresses you want to send to.
A file with a list of bounced emails (this is optional).
Proceed now with the steps below:
Now you should have a link and login details for your templates in staging.
Caution
To test your templates it's important that you have completed Step 2.
Go through your templates and check that the designs are how you want them. Follow this guide:
Testing your email templates
This guide explains how to test your email templates to make sure they work as expected.
If you forward an email, the styling will break, therefore it's important to first do test send-outs to all your recipients from the email editor. Remember that an email address will first need to be allowlisted so that the staging environment can send emails to it. Below are the steps to take when testing your template.
First of all, create a new email send-out. Do this as if you were creating a real send-out to your customers.
Confirm that all buttons, headers and texts in the send-out have the correct font and colors.
Check that all links, menus and default texts are correct for all the languages you are using. Use “Send as specific store” to populate the email with the correct translations and links.
Confirm that everything under the "Appearance" tab works as expected. For example, is your color library correct?
Toggle ON and OFF a few elements to check that they are working.
Fill out your text blocks with longer texts, which makes it easier to see if your margins behave as expected.
Fetch products into those modules with names ending in "PF" by using the product's SKU in Shopify (comma-separated if using multiple products in the same module). Confirm the correct product info is shown in the correct columns.
Test how send-outs behave in the web browser and in email clients, for both desktop and mobile devices.
Create and send emails for each translation/market you want to communicate with. Use “Send as specific store” to populate the email with correct translations, product feed and links.
Here are additional steps to take depending on if you are using abandoned cart, abandoned browse, order-related emails and/or double opt-in. Go through all of these steps that apply to your situation.
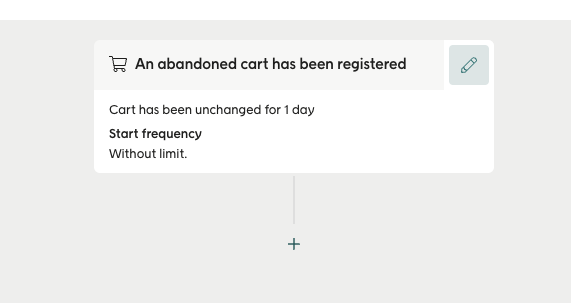
Create a new automation with the "Abandoned cart" trigger.

Change the entry criteria to "Immediately" so that it says: "Cart has been unchanged for 0.5 hours" in the automation.

Add a "Send email" activity in the automation. Create a new email. In the email editor, add the module "AC01 Abandoned-Cart" to the email and save it.
Save and activate the automation.
Go to your webshop using incognito mode and log in as a customer. Add something to your cart and then exit your webshop.
Within an hour you should have received an abandoned cart email. Confirm that it contains the correct products in the correct quantities.
Tip
For more help with troubleshooting abandoned cart, see here.
Create a new automation for abandoned browse.
Add a "Send email" activity in the automation. Create a new email. In the email editor, add the module: "AB01 Abandoned-Browse" to the email and save it.
Save and activate the automation.
Go to your webshop using incognito mode and log in as a customer. Browse around, click on a product and then close the tab.
Within an hour you should receive an abandoned browse email. Check that it contains the correct products.
Tip
For more help with troubleshooting abandoned browse, see here.
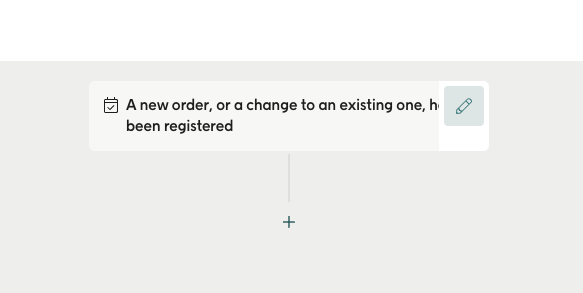
Create a new automation with the trigger “New or updated order”.
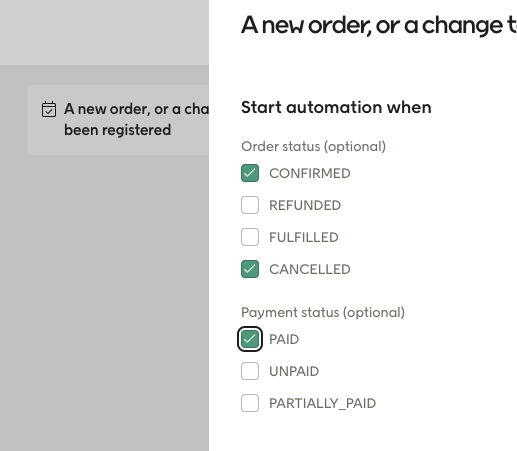
Change the entry criteria for the trigger so that it includes the Shopify statuses you want to use to trigger the Engage automation.

Here you can see the statuses:

Add a "Send email" activity to the automation. Create a new email. In the email editor, add the modules: “T01 Order Header”, “T02 Order Contact”, “T03 Order Items”. Save the email.
Save and activate the automation.
Go to your webshop and place an order.
Confirm that the email you receive shows the correct data.
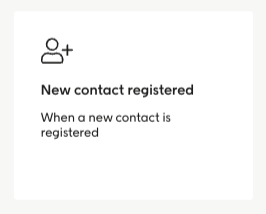
Create a new automation with the automation trigger “New contact registered”.

Add a "Send email" activity to the automation. Create a new email. In the email editor, add the module: “D01. Double Opt-in".
Save and activate the automation
Go to Your website and create a new account (make sure that the email address you enter for your new account is allowlisted in Engage).
Click on the Double Opt-in button in the email you receive.
In Engage, find the contact you just created. Make sure that the consent “newsletterConsent” has been set to true for them.
Here's some things that are up to you to check when working with email templates:
Test emails ending up in your junk inbox. Since testing is done in a test environment, be aware that this could happen.
The structure in the module breaking because of words used being too long.
How emails look and behave in dark mode. There is a guide for how to think about design optimized for dark mode, for example using backgrounds for dark logotypes or by using frames for certain elements. See the link at the end of this section.
Your font not being supported for all web browsers and email apps. This problem can be worse if your preferred font and fallback font differ a lot in terms of size.
The length of the text fetched from your product feed. It’s up to you to check this.
The size and aspect ratio of your images taken from your product feed.
Regarding dark mode, there are no official fixes for dark mode in email clients. We strongly recommend that you design with this in mind, using logos and icons that work for both dark and light mode. This way your email will work in all email clients, and there won't be any problems if there are any updates or changes to how the email clients read dark mode code.
You can read more about dark mode here.
 Allowlisting emails and SMS in staging
 Using stores and markets to show a specific language in email sendouts
Using this form, you can send feedback to Voyado about your email templates:
When you've filled out the feedback form, inform your Voyado team.
If you have a list of bounced emails (contacts whose email addresses cannot be reached) these need to be imported into Engage so it knows to not ever try to mail these contacts.
To do this, log into the FTP (you'll find the login details in your "Time to configure Shopify/Engage" email), place the file in the "Customer files" folder and contact onboarding-engage@voyado.com when you have done so. They will handle the manual import of the bounced emails file.
These addresses will now be blocked in your production environment, although not in staging (although an address anyway need to be allowlisted in staging to be able to receive communication).
Here's how you do that import in more detail:
 Voyado Academy Courses
These are the courses relevant for this step:
Now you'll wait for this to happen
Tip
You're done with Step 3! Your Voyado team will now get to work on:
 Correcting your email templates (if needed)
 Moving your approved email templates to the Engage production environment
You'll have to pause here until they inform you that this is done, and then you can continue with Step 3. In the meantime, check out the courses in Voyado Academy.
Step 4 - Move to production and go live
Now that things are tested and ready in staging, it's time to move over to the production environment and do your final tests there before you launch.
Tip
 Here's what you need before you start:
Make sure you've completed the "Introduction to email deliverability" course.
The base URL, credentials and API-keys for your production environment which you received in your "Time to configure Shopify/Engage" email at the end of Step 1.
Proceed now with the steps below:
This is where you reconfigure your Shopify app so that it connects to your Engage production environment.
Go to the "Engage account connection" area of the app in Shopify.
Hit "Disconnect" to removes your current connection.
Fill in the base URL for your Engage production environment which you received in your "Time to configure Shopify/Engage" email. You'll also need an API key, which you can generate yourself in the Configure Engage > API connections section of your Engage environment.
Hit "Connect" to connect the app to your Engage production environment.
Copy the "Encryption key" from the Configure Engage > Soft identification section of your Engage environment. Then go to the "Soft identification decrypt key" area of the Shopify app configuration and enter the soft identification decrypt key for your production environment.
Once the key is entered, press "Save".
The configuration you did for when the app was connected to your Engage staging environment will still be there. Now you'll need to go through every section in the Shopify app again and confirm that those settings (for example, store to country mappings) also apply for your production environment, and change them if they don't.
Since you've switched to the production environment, the migration of customers and orders from your Shopify account to Engage must be re-done. Go to the "Data import" section of the Shopify app and repeat that step.
You'll now need to set up similar automations as the ones you had in staging. Use those as templates or as inspirational automation when you set up your production automations.
If you're using double opt-in, here's how to set that up in Engage:
Now you'll need to start warming up your IP. This guide will walk you through that.
 And you're done!
Tip
Congratulations, you have now connected your Shopify store to your Engage account!
If you need custom contact attributes, this is the time to create them.
 Setting up custom contact attributes in Engage
If you have external customer (contact) data to import, you can do that now.
 Importing historical contact data
Finally, if you have a Shopify dev store, you could connect that to your Engage staging account (see Step 2.4 above). This gives you a safe place to test functionality without affecting your production environment.
 Voyado Academy Courses
These are the courses relevant for this step:
 Introduction to email deliverability (rewatch)
What happens now?
Tip
Now that you are live, a few more things will happen:
 Retro: You will be contacted by Voyado's support to book a meeting to go through your experience of setting up Voyado Engage in parallel with Shopify.
 Introduction to CSM and AM: Voyado will book a meeting to introduce you to your CSM (customer success manager) and AM (account manager) and go through how they will help you from this point on.