Setup & configuration
Here's how to set up and configure the Engage-Inretrn integration.
Requirements
For this integration you will need:
An active Inretrn license
An active Voyado Engage CXP and Omni license
An API key to access Engage from Inretrn
Setting up
The Engage integration is set up in Inretrn Admin under Integrations. This is where you specify your base API URL, your API key and if there are any other Engage contact types besides "Member" and "Contact" that Inretrn will need to deal with.

Set up automation
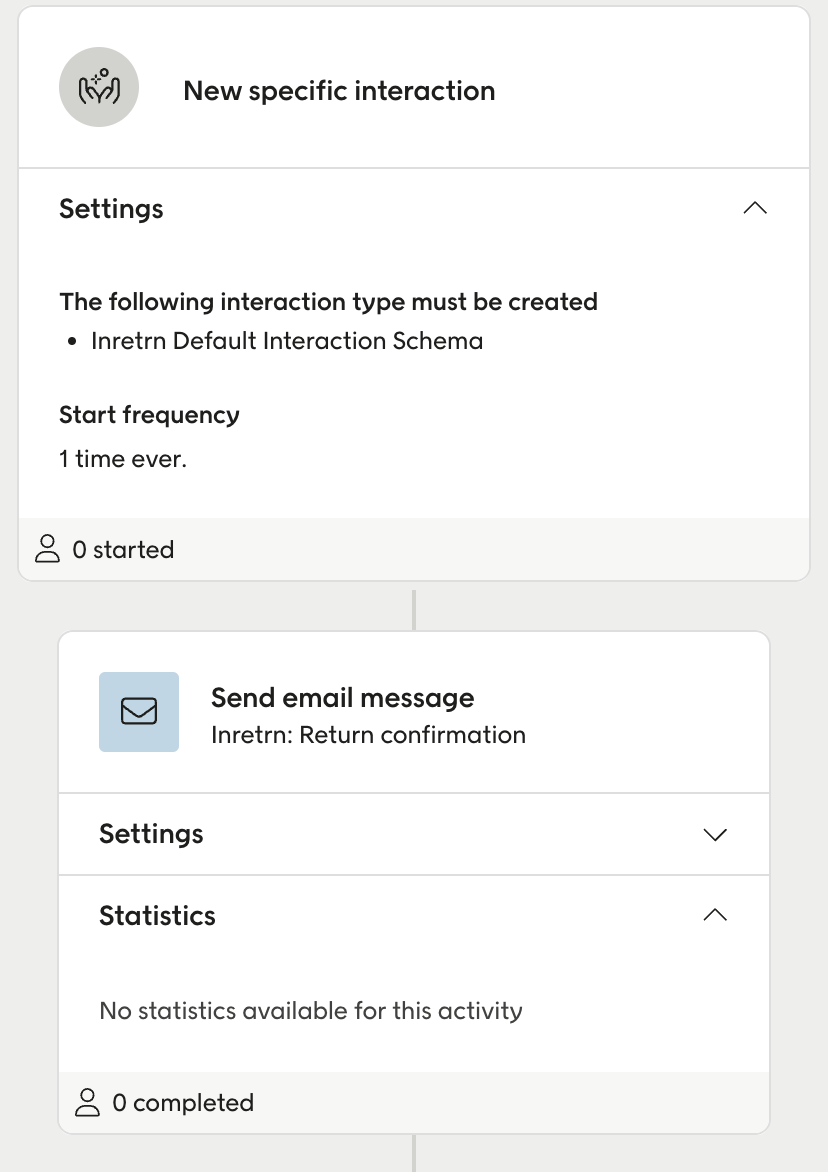
Inretrn will create an interaction schema on their end once they activate the automation. To activate the return confirmation, go in to Automations → New automation → New specific interaction → Inretrn Default Interaction schema.
Create an email with a Inretrn module and insert the module in the email.
Activate the automation:
Migration of receipts
Inretrn will also be able to migrate existing returns of the receipts to Engage. This is done in the Inretrn configuration along with the other config.
Setup in Inretrn
The integration with Engage is set up in Inretrn Admin under ‘Integrations’ where you need to specify API url, API key and if there is any more contact types then member or contact in Engage that Inretrn needs to identify with.

Example workflows in Engage with Inretrn data
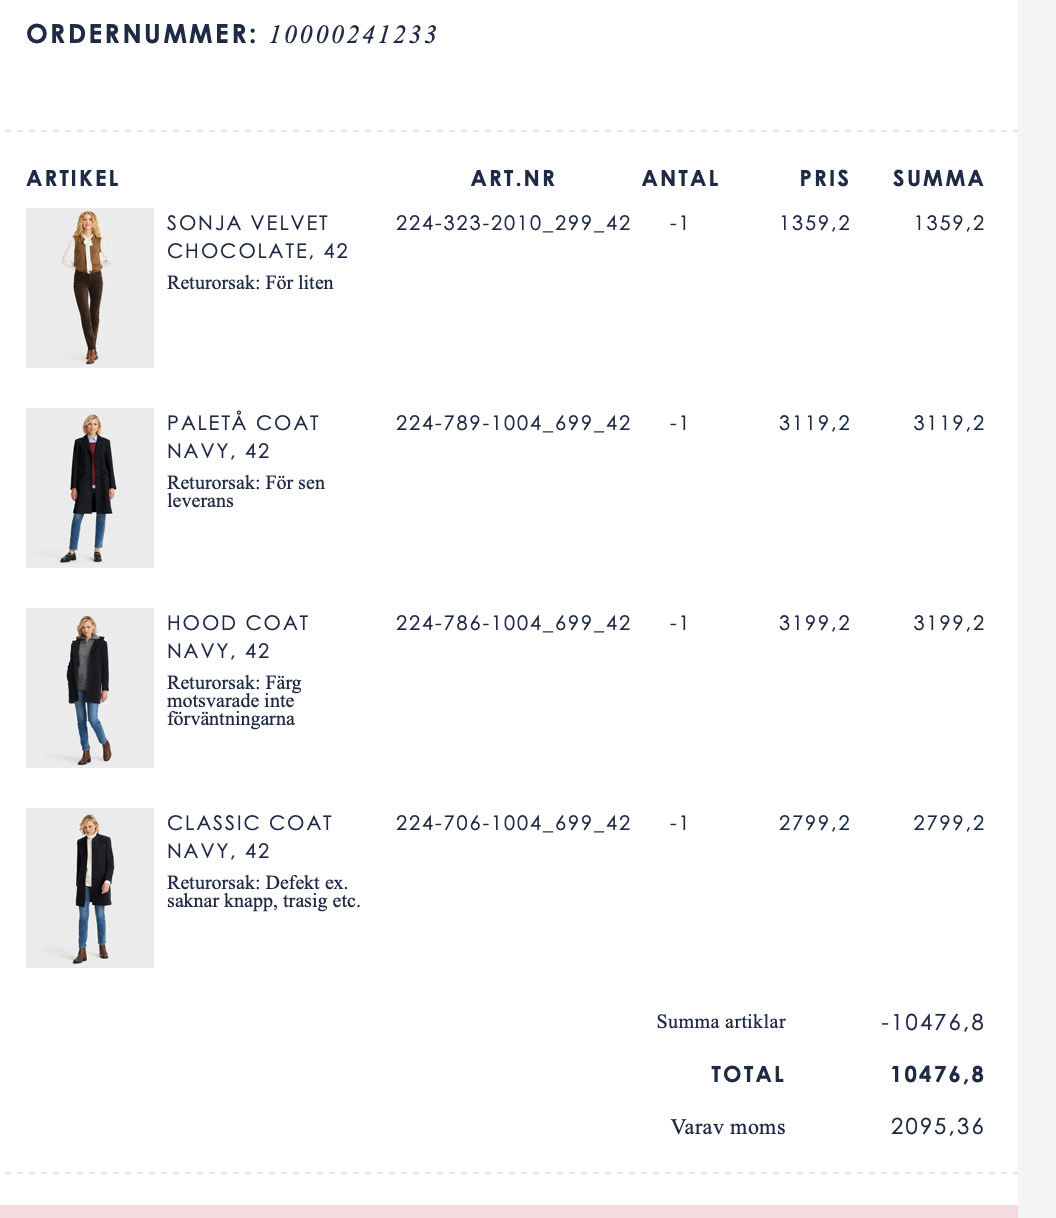
Return confirmation:
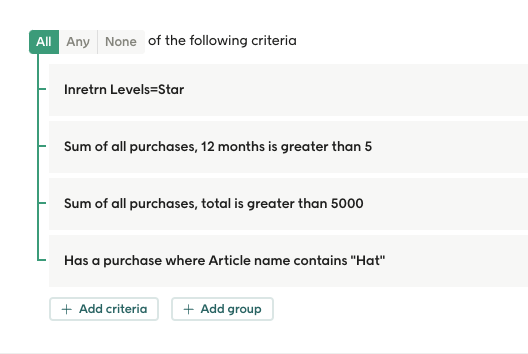
The KPIs from Inretrn can be used in segmentation and create target audiences:
These target audiences can be used in to filter in reports:

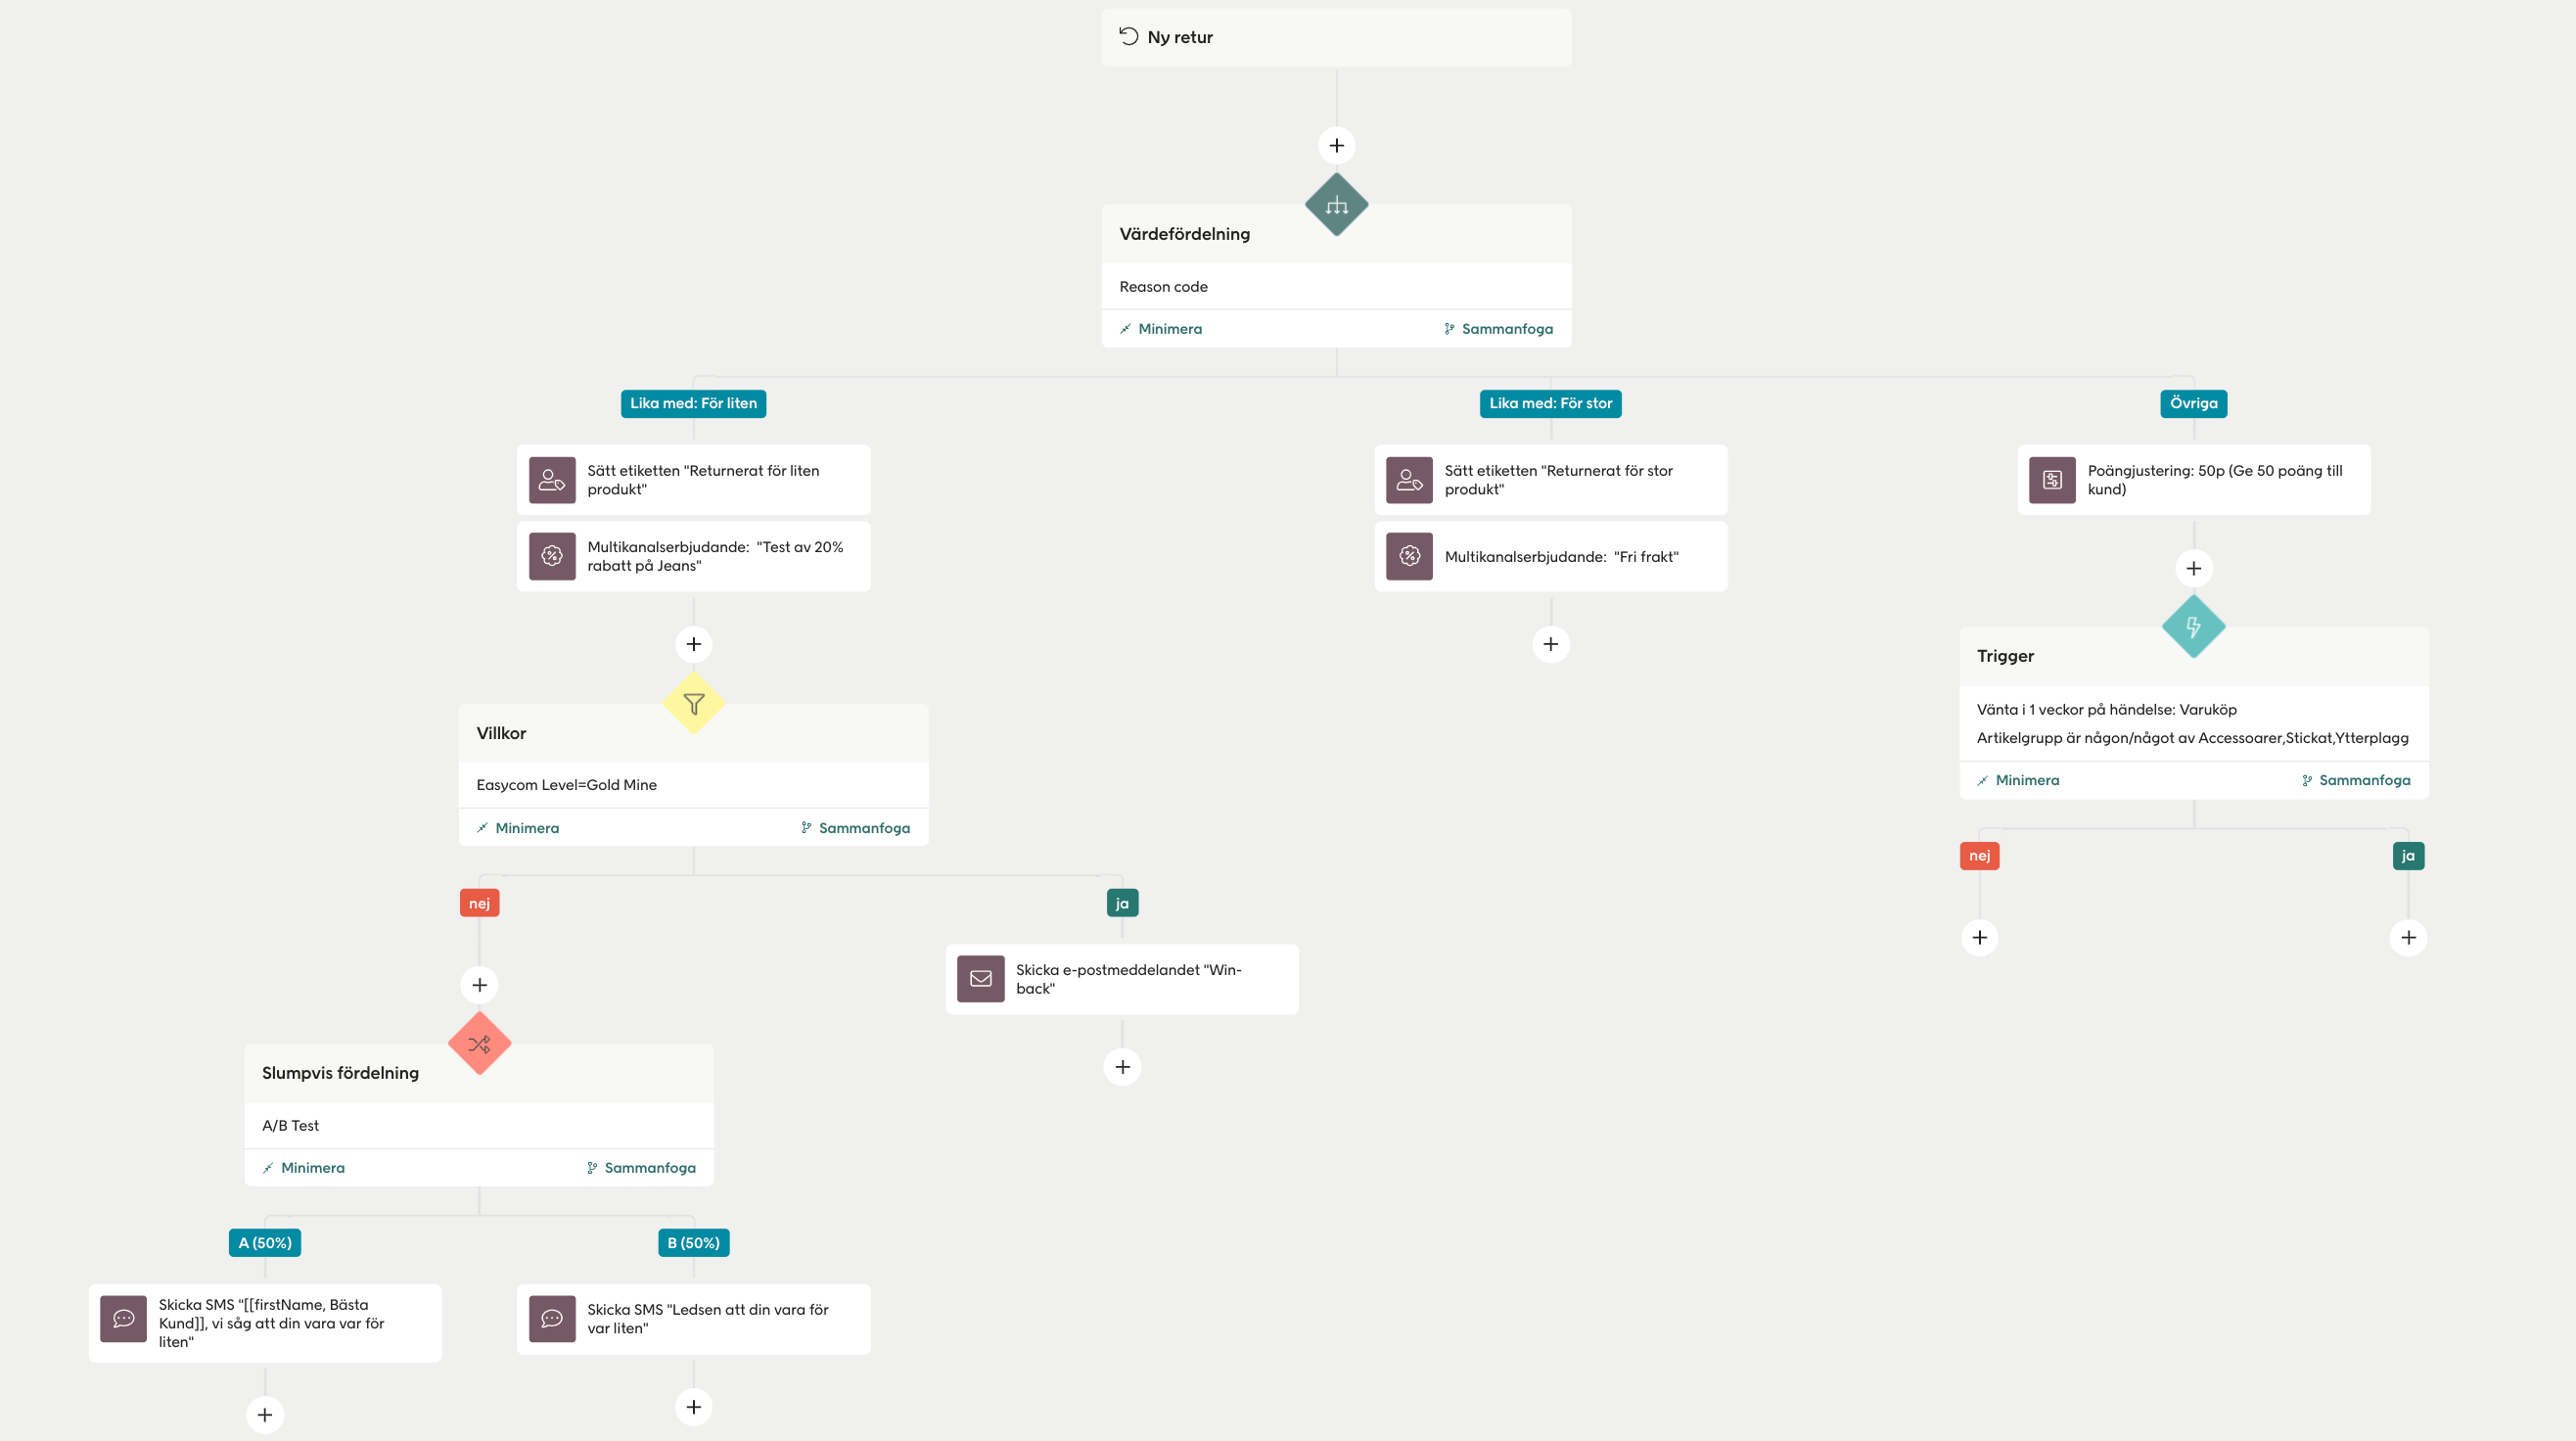
The data you get from the return can also be used in Engage's automation-tool:
You can also use data from Inretrn to filter on the module level in the Engage email-design-tool:
