Vipps CIBA flow
Warning
The minimum age to use Vipps is 15, but it is possible that in your Engage configuration a higher minimum age has been set. In this case, be aware that data coming in from Vipps won't be saved in Engage.
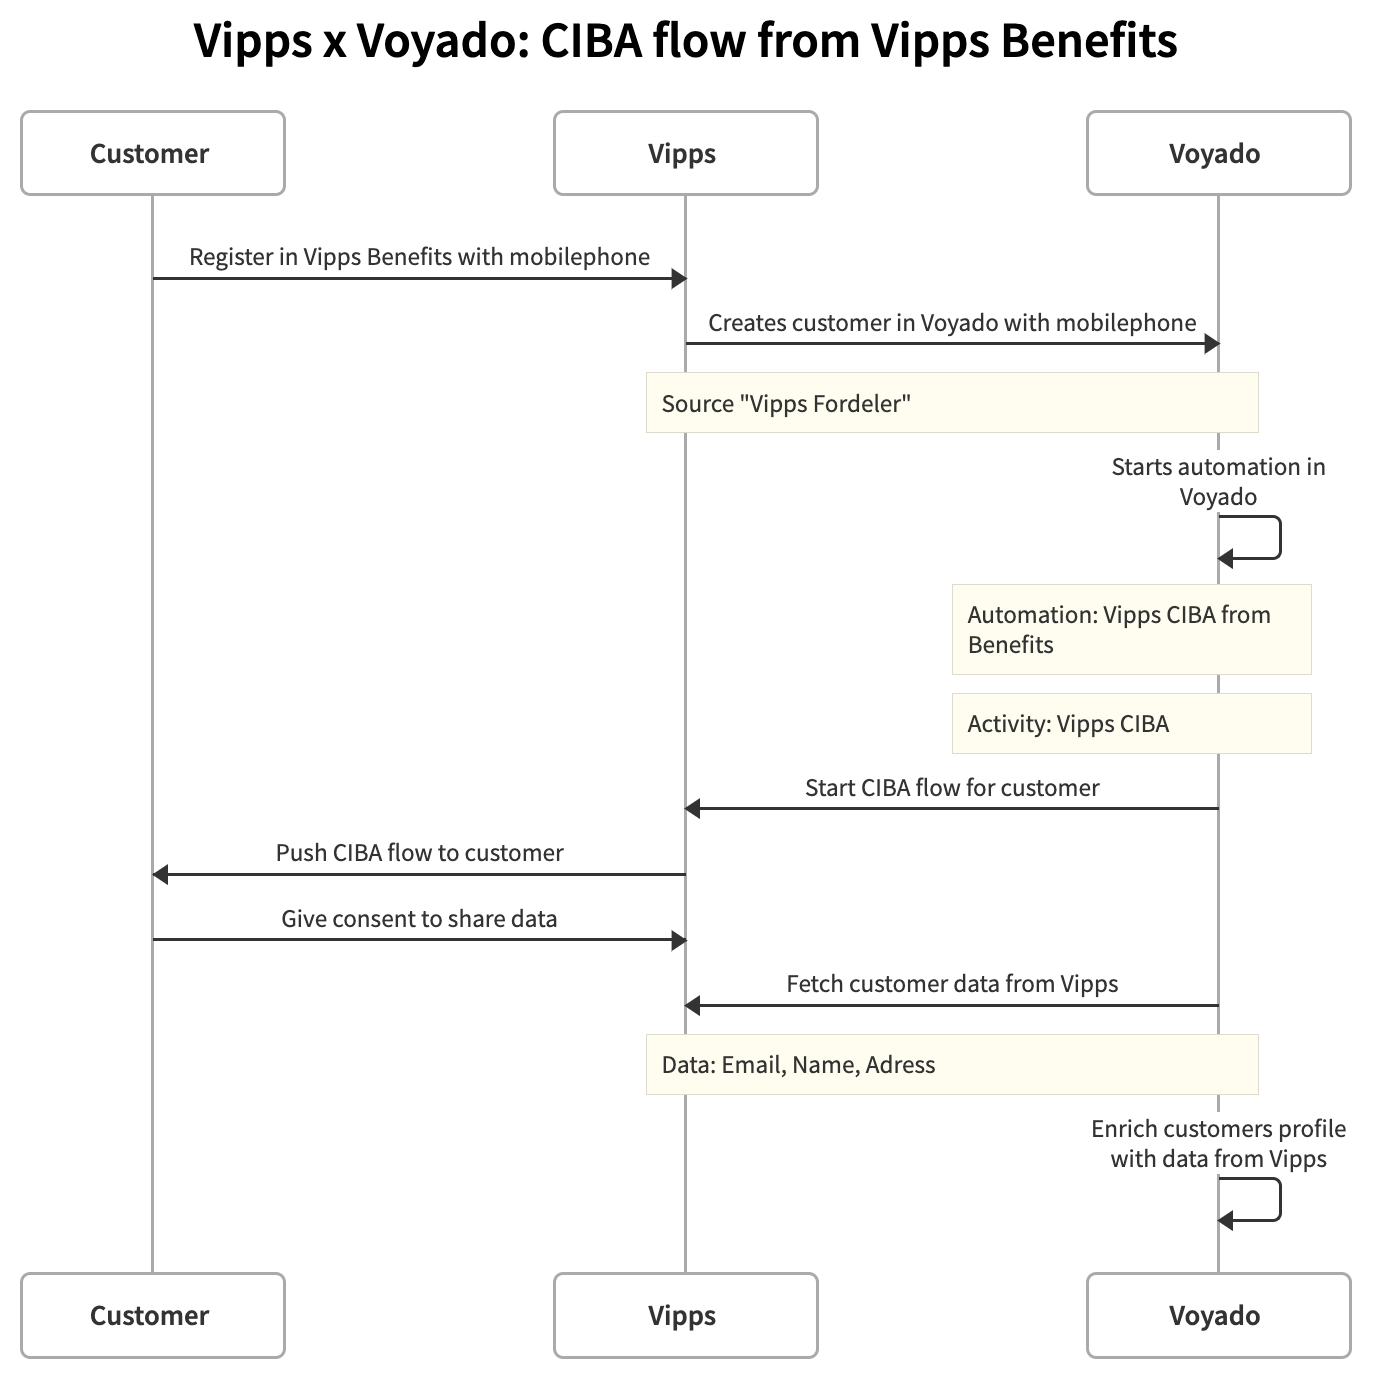
To be able to use Vipps with Engage the customer first need to sign up. This is done through what is technically known as a CIBA (Client Initiated Backchannel Authentication).
This starts in-store using the identifying QR-code displayed on the Vipps app on the customer's phone.
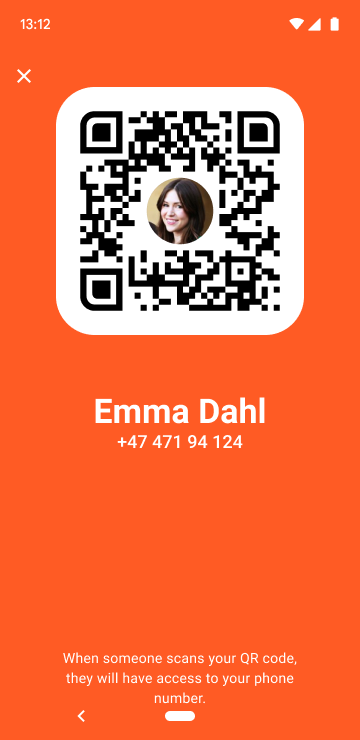
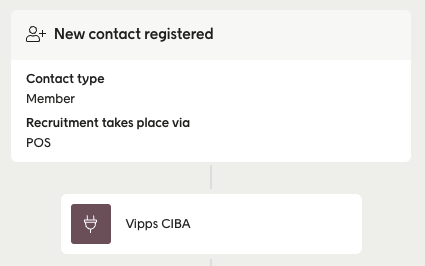
Once the QR-code is scanned by the POS, the customer's mobile number is fetched and displayed. The customer will then be created as a contact in Engage through the integration between the POS and Engage.
Note
Vipps will never create the customer in Engage; that is done by the POS.
Once the customer is created in Engage, a Custom Activity will trigger the onboarding flow that's been set up in Engage's automation tool:
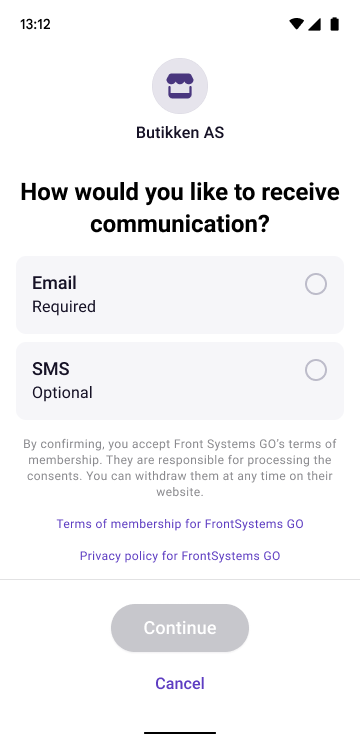
Engage then triggers an app push to Vipps to ask the customer to share data with the merchant:
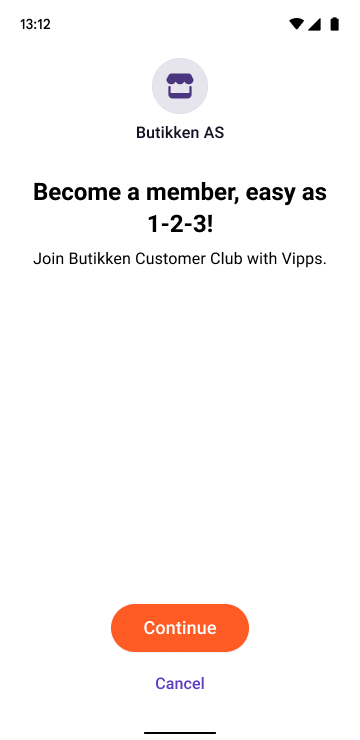
If the customer proceeds, they choose which consents (if any) they want to give.
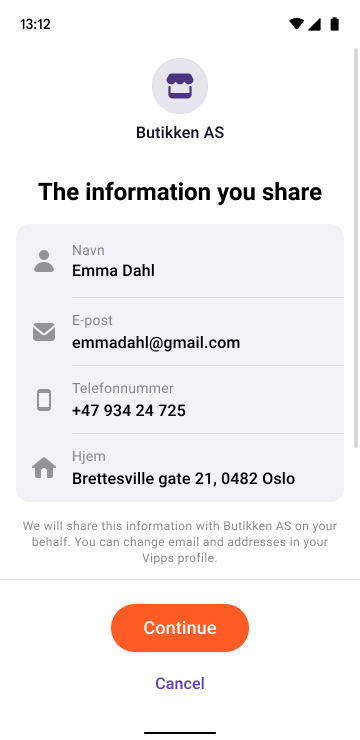
This customer has accepted to be contacted by email:
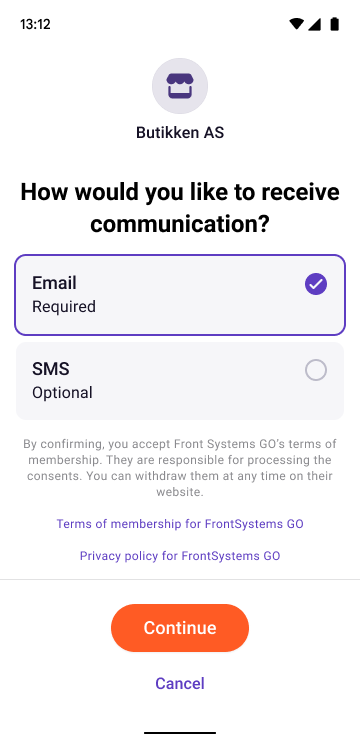
When the customer selects "Continue" the consents and their data are synced to Engage:

Here is a video showing the connection between Vipps and Engage:
Creation flow
The creation flow looks like this:
CIBA = Client Initiated Backchannel Authentication